

Jalapeño Cheez-Its
With the leftover cheddar and Red Leicester cheese from the red, white and bleu macaroni and cheese, I decided there was no better time than now to make homemade Cheez-Its. I also had a random jalapeño in the fridge.
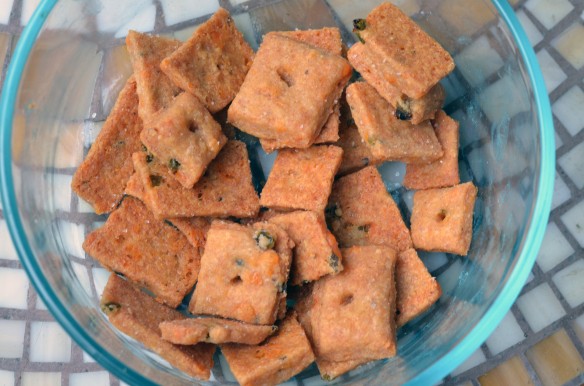
My Cheez-Its aren't the prettiest. One of the few kitchen gadgets I haven't managed to collect over the last couple of years is a pastry cutter to make the cute fluted edges, so I just used a pizza cutter. It worked just fine. I also didn't do the best job of cutting them the same size. Some were huge while others were tiny. It seemed the more I tried to make them uniform, the worse I was at it, so I gave up trying to make them identical. In the end, I think it gives my Cheez-Its a little character and a slightly rustic look. The smaller ones also got crispier, which is a good thing if you are in a mixed household like us, where one person prefers super crunchy and the other prefers slightly softer.

Jalapeño Cheez-Its
yields: I honestly have no idea since I ate so many before I had the chance to count, but two cookie sheets worth :)
- 7 ounces shredded cheese (I used Red Leicester and extra sharp white cheddar, but I think Monterrey Jack would be good too)
- 4 tablespoons unsalted butter, at room temperature
- 1/4 cup + 2 tablespoons whole wheat flour
- 2 tablespoons cornstarch
- 2 teaspoons salt + more for sprinkling on top
- 1/2 teaspoon pepper
- 1 jalapeño, seeded and finely diced
- 2 tablespoons cold water
- In the bowl of a stand mixer fitted with a paddle attachment, combine the cheese and butter until smooth.
- Add in the flour, cornstarch, salt, pepper, and jalapeño and mix on medium speed until uniform.
- Add in the water, and mix to form a dough.
- Wrap the dough in plastic wrap and chill in the fridge for 45 minutes.
- Preheat the oven to 375º. Line two baking sheets with parchment paper or silicone lined baking mats.
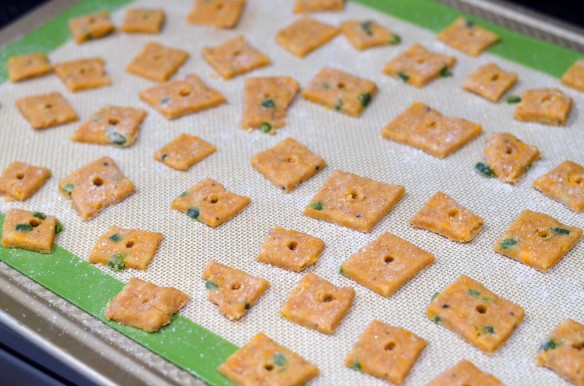
- On a lightly floured surface, use a rolling pin to the roll the dough out to approximately 1/8" thick, then use a pastry cutter, pizza cutter, or even a sharp knife to cut out squares.
- Transfer to baking sheets. Use a toothpick and wiggle it around to create a hole in the middle of each cracker. Sprinkle with additional salt.
- Bake for 13-16 minutes to desired crunchiness.
- Cool on the pan for several minutes before enjoying! Store in an airtight container at room temperature for up to 3 days (there are no preservatives in them, so they could get moldy if left longer).
adapted from America's Test Kitchen