


Red, White & Blue Swirl Cookies
Happy 4th of July!
Today we are preparing for D's parents coming into town and a big party at our apartment complex with neighbors and friends. I, of course, volunteered to make desserts, so I've been frantically preparing doughs, custards, pie crusts, and more over the last few days. I made the dough for these a few days ago, wrapped the logs tightly in plastic wrap, and let them sit in the fridge to be baked up for the party today.
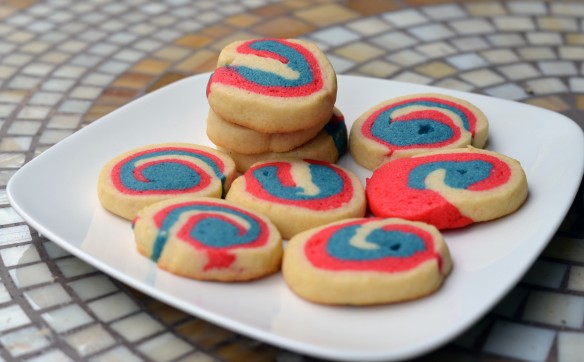
I think they are incredibly cute and festive. Easy too. And they could really be customized with any color for any occasion or celebration.
Now I must go continue my baking for today!
Red, White & Blue Swirl Cookies
yields about 5 dozen cookies
- 3 cups all-purpose flour
- 1/2 teaspoon baking powder
- 1/2 teaspoon salt
- 1 cup unsalted butter
- 1 1/3 cups granulated sugar
- 2 eggs
- 2 teaspoons vanilla extract
- red food coloring
- blue food coloring
- festive sprinkles (optional)
- In a medium sized bowl, sift together flour, baking powder, and salt.
- In the bowl of a stand mixer outfitted with a paddle, cream together the butter and sugar until light and fluffy.
- Add in the eggs, one by one, mixing after each addition, followed by the vanilla.
- Divide dough into 3 pieces. Take one piece and shape into a 6"x6" square. Wrap in plastic wrap and refrigerate for an hour.
- Take another piece, put back in the stand mixer bowl and add blue food coloring until desired color is reached. Shape into 6"x6" square. Wrap in plastic wrap and refrigerate for an hour.
- Clean bowl thoroughly. Take remaining piece of dough and add red food coloring until desired color is reached. Shape into 6"x6" square. Wrap in plastic wrap and refrigerate for an hour.
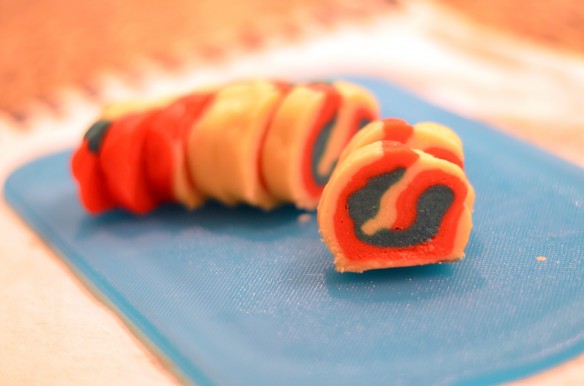
- Place each square of dough between two pieces of wax paper and roll out until you have a rectangle of dough approximately 1/8" thick.
- Remove one side of wax paper from the color you want on the outside of the cookie and set dough facing up.
- Remove one side of wax paper from next color, then press the two pieces of dough together gently. Remove the second sheet of wax paper from the second color of dough. Repeat this process with the third color.
- Starting with a long side of the rectangle, roll the dough up to create a long log. Cut into smaller, more manageable logs, wrap in plastic, then refrigerate. This process can be done several days in advanced. Make sure to take the dough out every once in a while and roll it around, so you don't end up with a flat side.
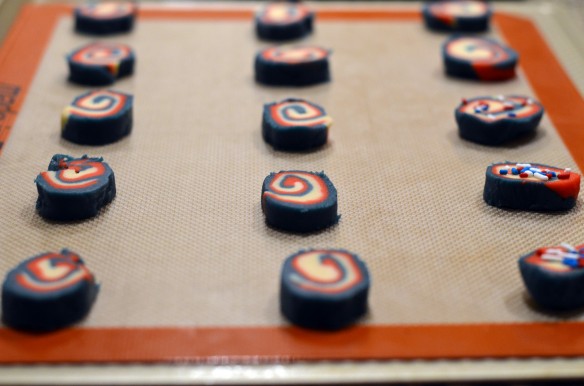
- When you are ready to bake the cookies, preheat the oven to 375° and remove the dough logs from the fridge. Cut into 1/4" slices and place on parchment paper or silicone lined baking sheet, leaving approximately 2" between each cookies to expand. Add some sprinkles to tops if desired.
- Bake for 9 minutes. Cool on the pan for 2 minutes before transferring to wire cooling rack.
recipe from FoodNetwork.com